Author Archives: soulseekah

Resigning Tampered Android APKs

After tampering with a signed apk using tools like smali/baksmali or even apktool here are the steps to rebuild and resign the Android application (from application root):

keytool -genkeypair -alias androiddebugkey -dname 'CN=Android Debug,O=Android,C=US' -keystore /tmp/debug.keystore -keyalg RSA -validity 10000 generate a valid Android debug keypair (Signing in Debug Mode) with password ‘android’ for both the keystore and the keys

rm -rf META-INF if such exists

zip -9 -r out-unaligned.apk . to zip things up

jarsigner -sigalg MD5withRSA -digestalg SHA1 -keystore /tmp/debug.keystore out-unaligned.apk androiddebugkey sign it

zipalign 4 out-unaligned.apk out.apk align it

keytool -printcert -jarfile out.apk check it

adb install -s out.apk install it (you may need to uninstall a previous version of the application in case of certificate errors


tail -f | event

Monitoring log files for specific keywords and firing off an event turns out to be quite simple to accomplish in bash with a `while` loop.

#!/bin/bash

tail -f $1 | while read line; do
    line=`echo -n "$line" | grep -i "$2"`
    if [ -n "$line" ]; then
        # mate-notify-send -t 0 "$2 has been logged"
        echo "$2 has been logged" | mail -s ...
    fi
done

Something I’ve been using quite a bit lately expecting keywords to show up in various local and remote logs (ssh ... "tail -f ..."). What log event monitoring tools do you use?

Also, since this is the second time I decided to share a bash snippet quickie and have received some improvement feedback on my first one I’ve created yet another “bash-utils” repository. Feel free to chime in.


Monitor Directory for Changes

Here’s a simple script that I setup for my development WSGI server to reload itself once changes in source code are detected:

#!/bin/bash

while true; do
    A=`find $1 -printf '%t' | md5sum`;
    sleep 1
    B=`find $1 -printf '%t' | md5sum`;
    if [ "$A" != "$B" ]; then
        echo "Detected change, doing: $2"
        eval $2
    fi
done

It’s very simple (a poor-man’s replacement for inotify) and doesn’t do anything complicated. Usage ./monitor.sh application "my-reload-services.sh". You can filter out unwanted stuff like maybe *.swp files by referring to the man find pages.

What do you use to monitor for changes? How can the above script be improved?


Dubugging Flask applications under uWSGI

Flask comes with a fantastic debug mode available with the built-in server, but is advertised as unusable under uWSGI, due to some forking limitations, which I couldn’t understand. There is a way that allows you to spawn the development debug mode in Flask (and Werkzeug) regardless of what everyone around seems to say.

Before the if __name__ == '__main__': part of your application, i.e. at the very end, you have to wrap a werkzeug.debug.DebuggedApplication middleware around your app object.

if ( app.debug ):
    from werkzeug.debug import DebuggedApplication
    app.wsgi_app = DebuggedApplication( app.wsgi_app, True )

That’s it. Simple as that! Debug your Flask application from the browser, without using the built-in development server. Don’t forget to switch off debugging in production, as the console offers arbitrary code execution.

For everything else there’s Winpdb.


Setting up Flask with nginx

I’ve decided to implement one of my next projects in Python. I picked Flask as my HTTP framework for its lightweight and unbinding design. It pretty much allows you to do everything at a low level, should you want to. And I do; I always prefer a low-level approach, without the bulkiness, APIs, configuration files, etc.

In any case, since my webserver of choice has long been nginx (built-in servers don’t impress me too much), having it serve Flask applications in a robust, reliable way was required. The instructions to marry nginx and Flask via uWSGI are quite clear. I compiled the uwsgi application container, read the docs and came up with the following startup command:

sudo uwsgi -s /tmp/uwsgi.application.sock --chdir /path/to/application -w application:app --uid "www-data" --gid "www-data" --touch-reload . --daemonize /var/log/uwsgi.log

The above is a development setting and will probably be very different in production. Since Flask doesn’t force any convention upon you, I picked the following project layout for now:

.
|-- application
|   |-- application.py
|   |-- models
|   |-- routes.py
|   `-- views
`-- static
    |-- favicon.ico
    |-- js
    |   `-- script.js
    `-- robots.txt

All Python code is in the application directory, where uwsgi runs it. Static files are a directory above that, and will be served as from there and not pollute the source tree. I could have kept the static directory under application just as well, but I’ll keep it outside for now. Here’s what I came up for my server { listen 80; server_name application.lo www.application.lo; root /path/to/application.lo/application; try_files /../static/$uri @application; location @application { include uwsgi_params; uwsgi_pass unix:/tmp/uwsgi.application.sock; } }

This is quite suitable for now. Any recommendations?


Android shell tricks: ps

If you ever played around with the adb shell you may have found that the ps utility, which lists process lists, is not as verbose as you would expect it to be. And, to make things worse, there’s no inline help or man entries. Here’s the ps utility usage line: ps -t -x -P -p -c [pid|name].

Android shell tricks: ps

  • -t show threads, comes up with threads in the list
  • -x shows time, user time and system time in seconds
  • -P show scheduling policy, either bg or fg are common, but also un and er for failures to get policy
  • -p show priorities, niceness level
  • -c show CPU (may not be available prior to Android 4.x) involved
  • [pid] filter by PID if numeric, or…
  • [name] …filter by process name

Android’s core toolbox (shell utilities) are more primitive than the ones you may be used to. Notice how each argument needs to be separated and you can’t just -txPc it all, the command line argument parser is non-complex.

It’s a pity how command line arguments are not shown. If you need something that’s not available by the stock ps shell utility, try manually combing through the /proc directory. For the command line one would do cat /proc/<pid>/cmdline.


Don’t Post Images of Your Credit Card Online

Yes, people actually do that and an account I’ve been following @NeedADebitCard aggregates credit card photos on Twitter. Not all images are relevant but many are. Credit card fraud is a serious issue as is, with all our connectivity to the World Wide Web and technology that allows us to be “social” that makes many people act irresponsibly, aggravates this.

Credit cardAnd some people actually think there’s nothing bad in posting parts of the card. Yet, the same people have no understanding of which parts are safe to display and which are not. General rule – don’t show your credit card at all, especially online for the general public to view. I have wiped out the critical information in my version of the image as to stop the propagation of this nonsense. The cardholder pasted the image in the clear. Size is taken from the original.

This was a recent image shared via Instagram and Twitter. The person’s peers left 20+ “aww”-type comments, and nobody pointed out that it might have been a bad idea. A sane person on Twitter did so, and the cardholder responded with confidence that it was not a problem since not all the information is available. Now, see, what you get when you don’t understand the technology you use every day?

The cardholder’s screenname contained her name, so the missing name on the left side is not missing any more. The first four digits are a BIN, a Bank Identification Number (or IIN, Issuer Identification Number). We know the issuer – Capital One, it’s a MasterCard Platinum. Quick search through the many BIN lists available online yielded the first 6 digits of the card – 517805, with the last two digits to confirm a match, plus upon closer inspection you can see digits two and three of the BIN in black under the silver numbers, a 7 and an 8 (look under the finger on the left).

After pointing out the bits of “concealed” information that I’ve managed to find out in under 5 minutes, the cardholder took down the image.

Quite excellent. Even if say the last 4 digits were somehow concealed, Luhn’s Algorithm would decrease the search space quite a bit, leaving a handful of valid numbers (probably, whoever does the math gets some kudos). We’re missing the CVV, but we have the rest – issue and expiry date, photo of the card, photo of the person, and a whole bunch of other photos of the person online (identity fraud anyone?). And the CVV part is not an issue in many CNP (card-not-present) points of sale.

Is posting images of your credit card online bad? Without doubt. And teach your children to be highly responsible when using modern technology, and think twice, no matter how confident they are.

Be safe.


Compiling Objective-C without a GUI

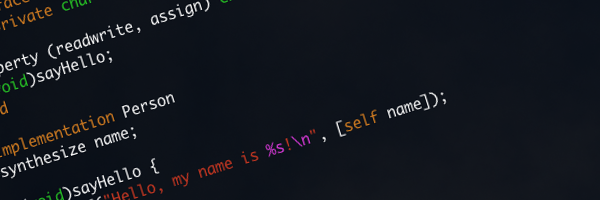
I have very recently got a Mac Mini and obviously looked into Objective-C. I’m quite intrigued by the language and it’s quite useful to learn, yet I’m not a fan of the Mac, nor am I a fan of the GUI, so the first thing I wanted to know is how to compile Objective C without XCode and/or without a Mac. This is a beginner’s guide to compiling Objective-C (version 2.0) on Ubuntu and OSX.

Compiling Objective-C

Continue reading


Extra Data in jQuery AJAX Requests

Sometimes it’s necessary to bind some additional data to an AJAX request, data that is not sent over the wire but has to pop up in the callback.
For instance:

var dataStreams = [];
dataStreams.push( { 'id': 'A04AC', 'data': 'Hello World' } );
dataStreams.push( { 'id': 'AVM32', 'data': 'Easy does it!' } );
dataStreams.push( { 'id': 'VXI34', 'data': 'Requesting backup...' } );

jQuery.each( dataStreams, function( i, e ) {
    jQuery.post( 'https://out.local/process.rpc', e.data,
        function( data ) {
            /* data from server */
            /* but how do I access the original request object? */
        }
    );
} );

The original object can be passed via the XHR object which is an argument to the AJAX callback. The jQuery.post call returns the XHR object which can then be accessed in the callback.
This works for all jQuery AJAX functions.

jQuery.each( dataStreams, function( i, e ) {
    jQuery.post( 'https://out.local/process.rpc', e.data,
        function( data, success, xhr ) {
            /* data from server */
            /* xhr._extra = [ i, e ] the original request object can be accessed here (e.data, e.id) */
        }
    )._extra = [ i, e ]; /* it's an object, yay JavaScript! */
} );

There you go, just make sure the _extra object property name does not collide with any of the existing XHR properties (and prototypes).